EMS Nearspace Balloon a Success!
- Reach at least 65,000 feet in altitude
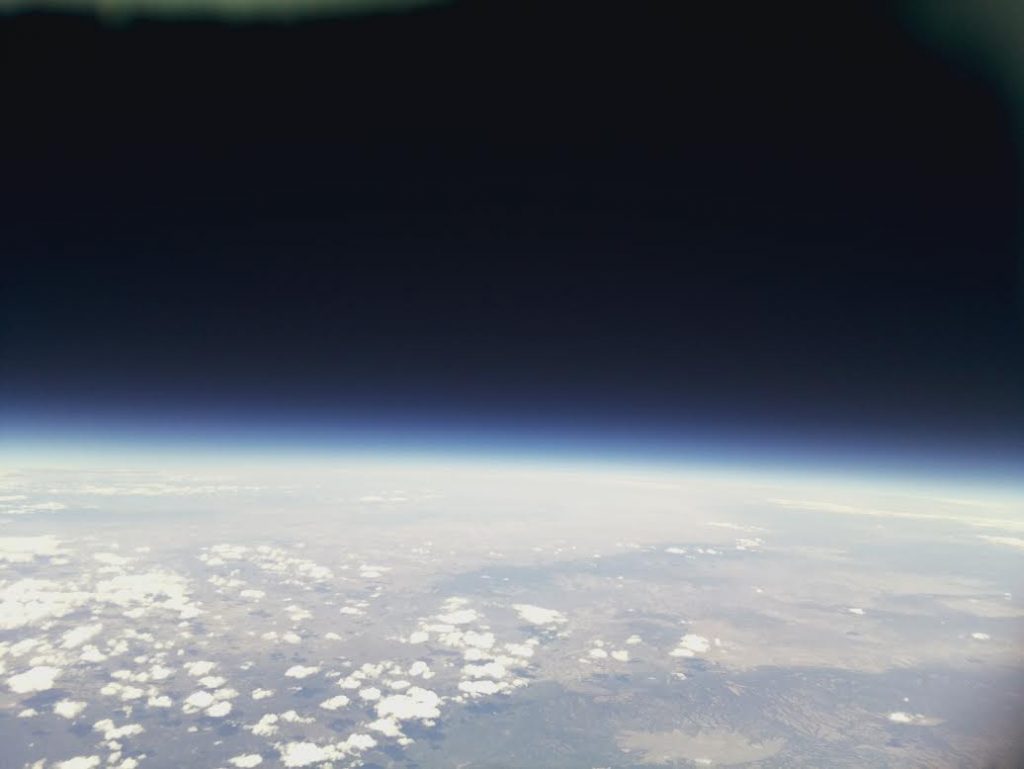
- Take high quality photos from altitude
- Successfully track and recover the payload once it lands
We are happy to report that we achieved all three goals! In fact, we reached an altitude of over 86,000 feet! How did we do it? Let’s dig in.
The Technology
The heart of the project is the tracking system. For this we used an inexpensive Baofeng ham radio walkie talkie. This was hooked up to a TNC-Pi, which acts as a sort of radio modem. The TNC-Pi plugs right into a Raspberry Pi, which is our primary computer. A GPS module is also plugged into the Pi. The Pi reads the GPS data and transmits it over ham radio using the APRS protocol. We have another ham radio on the ground that can pick up the signal and plot the location on a map. This way, we can track the balloon as it moves. Why do we have to track it? Well first of all we want to save our investment. If we lose the payload then we lose the money and time that went into designing it. If we recover it, we can launch it again and again. Second, the ham radio does not have enough bandwidth to transmit all of the photos down to us in real time. Instead, they are stored on an SD card. If we want to recover our photos, we have to recover the payload.
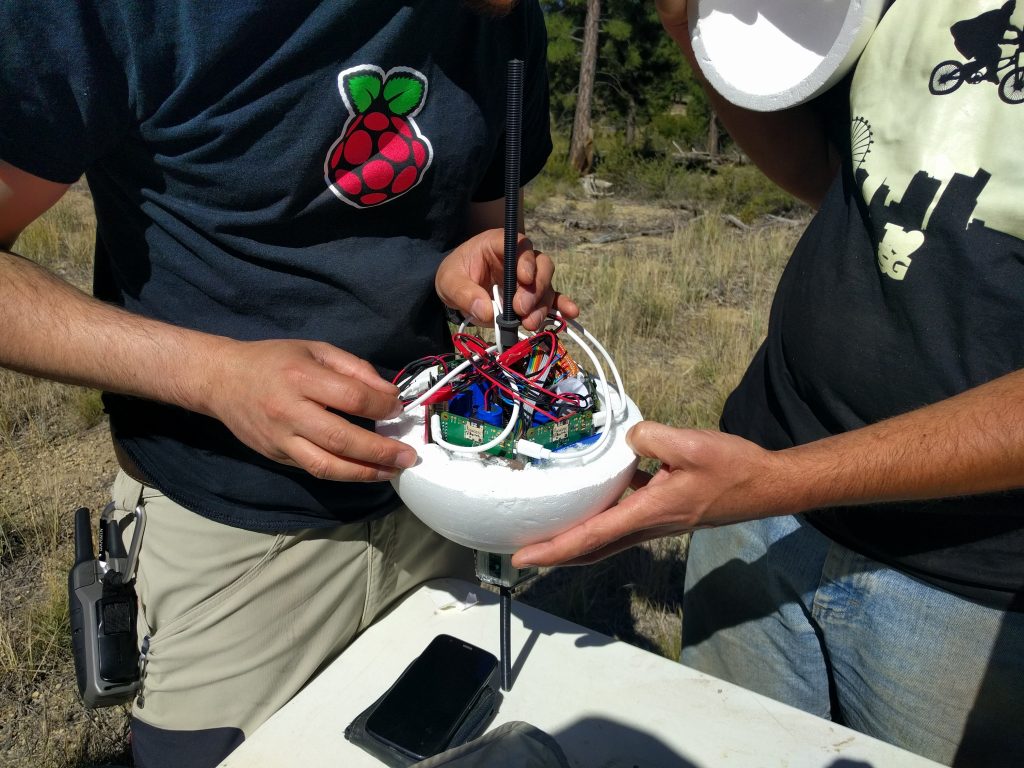
Another one of our goals was to take high quality photos. To accomplish this, we used a Raspberry Pi camera. It’s plugged into our primary computer. The Pi takes a photo every minute. We also designed a secondary camera payload. This second payload is a completely independent system containing six more Pi’s, each with its own camera. The Pis are hooked up to an external clock source. Each time the clock pulses, all six Pi’s take a photo. The idea was that we could obtain 360 degree panoramic images. Unfortunately we had some technical problems with the payload pre-launch and we lost 2/3 of our batteries. This resulted in the system running out of power before we left the ground. We intend to launch the balloon again after we fix this payload so we can get the photos we all wanted.
We also added some weather sensors to the system. We hooked up a pressure and temperature sensor to the primary computer. The sensor stayed inside the capsule so we could measure the internal temperature at different points of the ascent and descent. This way we would know if we need to improve our design for future launches in order to keep the electronics working smoothly. The Pi logged this data locally, but also transmitted it to us via APRS text message. That way if we lost the payload, we would still have this valuable data.
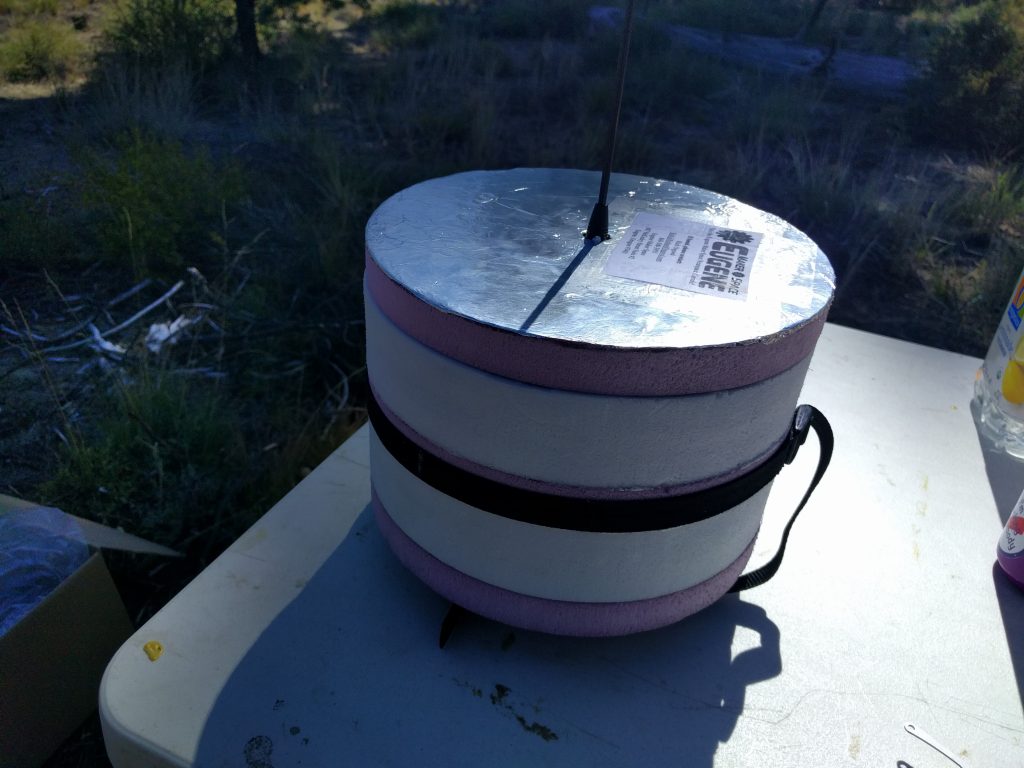
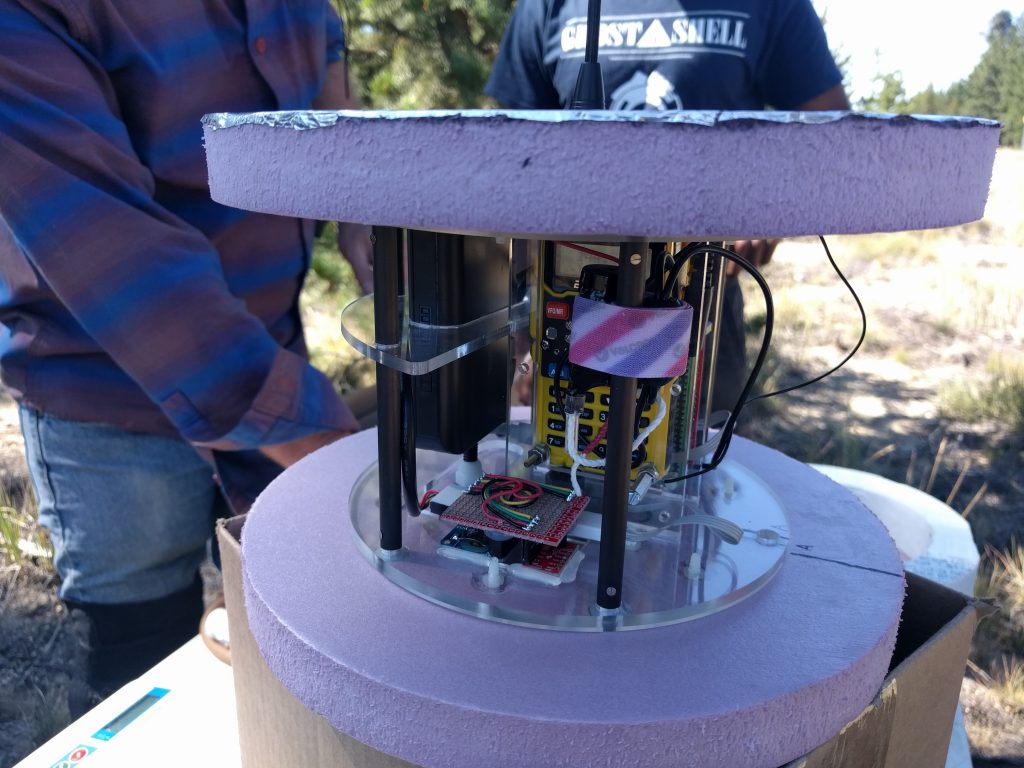
Once the electronics systems were functional, we had to design a chassis to hold them all. The chassis has to be big enough to hold all of the components, strong enough to withstand impact with the ground upon landing, and insulated enough to keep everything warm during the flight. It also needs external mounting points to mount the parachute, and also to mount the panoramic camera payload to the primary payload. The internal frame of our chassis was designed on a computer and laser cut out of acrylic. All components except for the camera mount to this frame. We then designed a cylindrical foam housing for the frame. This encloses the entire structure and is held together with nylon straps. The camera payload frame was custom designed and printed on a 3D printer. All of the Pi’s and cameras mount to that frame. The housing for this payload was made from a pre-made foam sphere.
The parachute and balloon were both purchased online. We used a 600 gram balloon and a 48″ parachute. The lines connecting everything together were 50lb test. This ensures that the line will break if the payload were to collide with an aircraft.
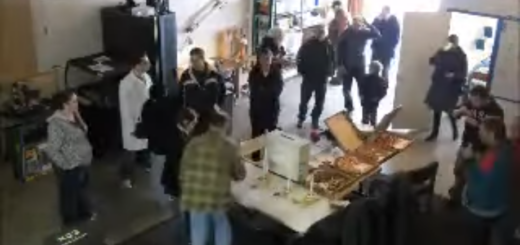
Launch Pad and Filling Station
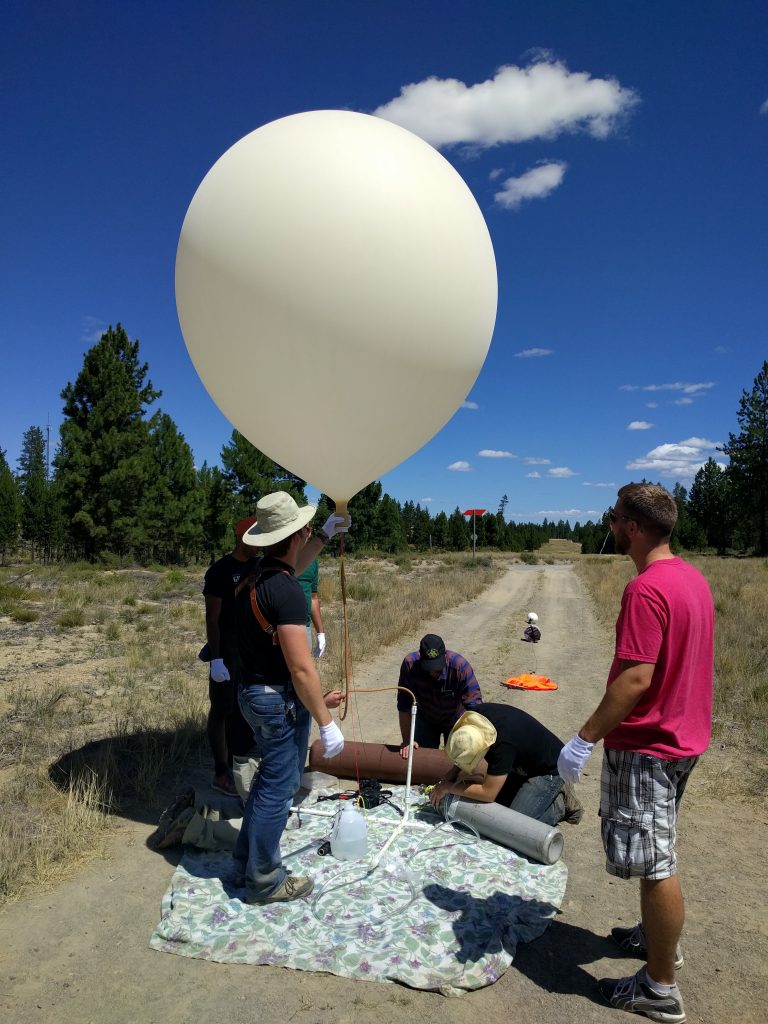
In order to actually launch our payload, we needed to have some kind of launch pad and filling station. We set down a tarp with a blanket on top. This would help protect the balloon from any sharp objects on the ground should it fall while filling. We had three helium tanks, each with 80 cubic feet of helium. We only ended up needing around 115 cubic feet. The tanks went through a regulator, which then hooked up to a PVC frame. On top of the frame was a length of latex tubing. The other end of the tubing is hooked up to a larger PVC “nozzle”. The neck of the balloon stretches around this nozzle to keep it in place.
The nozzle also is tied off to the helium tank as a safety precaution to keep the balloon from taking off if we accidentally let go of it. The nozzle is also tied to a gallon jug of water. This jug was filled up just enough to match our total payload weight plus additional lift minus the weight of our filling nozzle. When the balloon becomes neutrally buoyant with the jug attached, we know we’ve filled it up enough.
Once the balloon was fully filled, we rolled the balloon neck up around a loop of rope and closed it off with a few zip ties. The rest of the payload was then tied onto the rope loop.
Launch Predictions
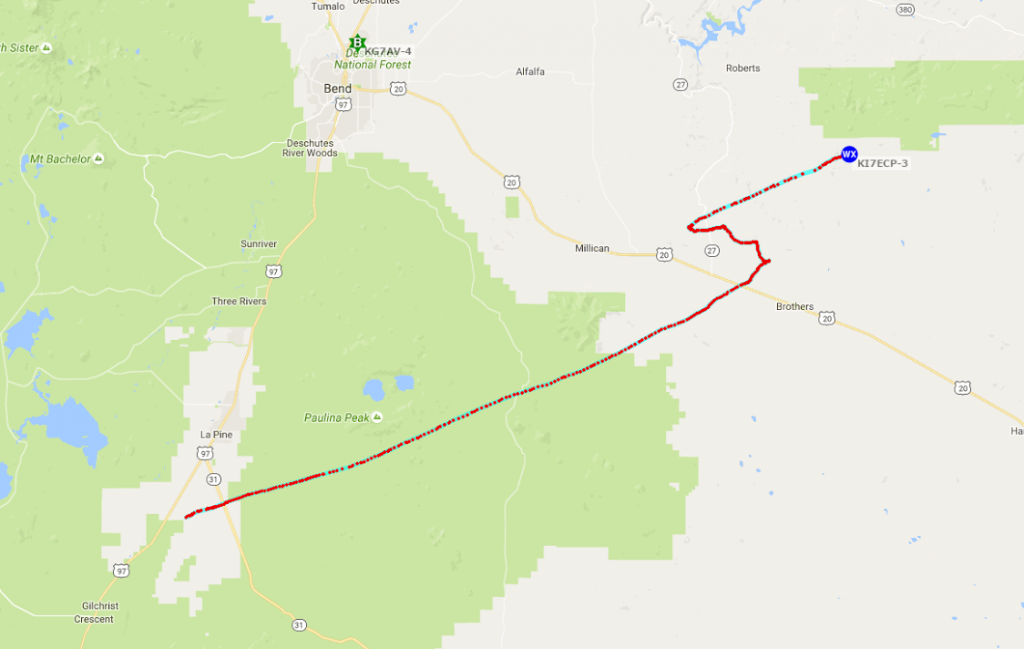
Once everything was completed, we had to decide where to launch from. We needed to ensure that the payload would not land in a heavily populated area, body of water, mountain, forest, or airport. We used an online balloon prediction software to try a few places, and eventually settled on a spot just south of La Pine, Oregon. The predictions showed that the balloon would head northeast and had a good chance of landing in flat desert, so it would be easy to recover. The predictions also showed that the balloon would likely reach an altitude of around 82,000 feet before bursting, way above our goal of 65,000 feet.

Actual Flight Path
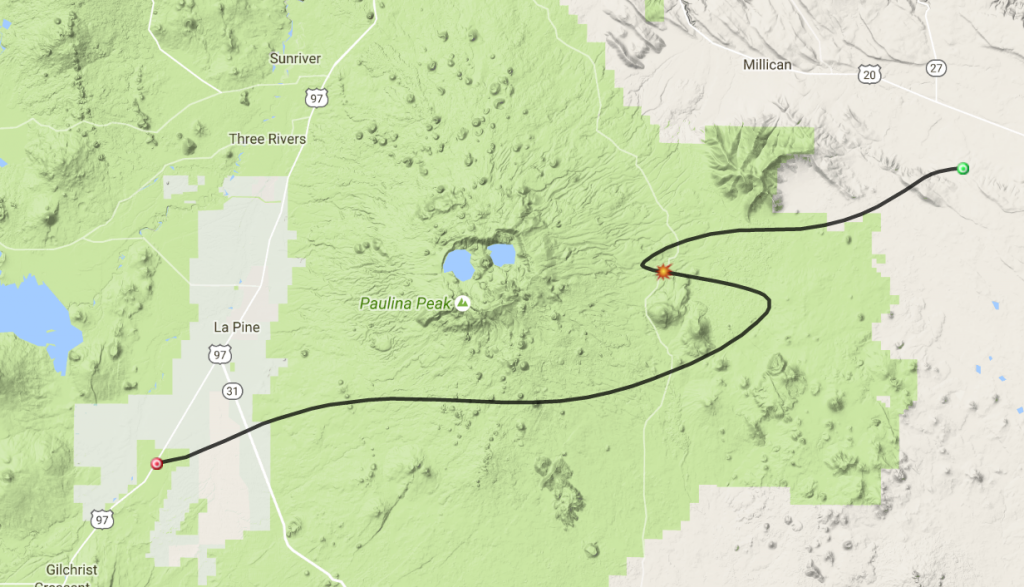
The actual flight path closely followed the prediction. Our payload went further to the northeast than we had expected, which meant a long drive on some dusty dirt roads and a half mile hike through the desert to recover it. It is interesting to note that the general pattern does match closely to the prediction.
Data Collection
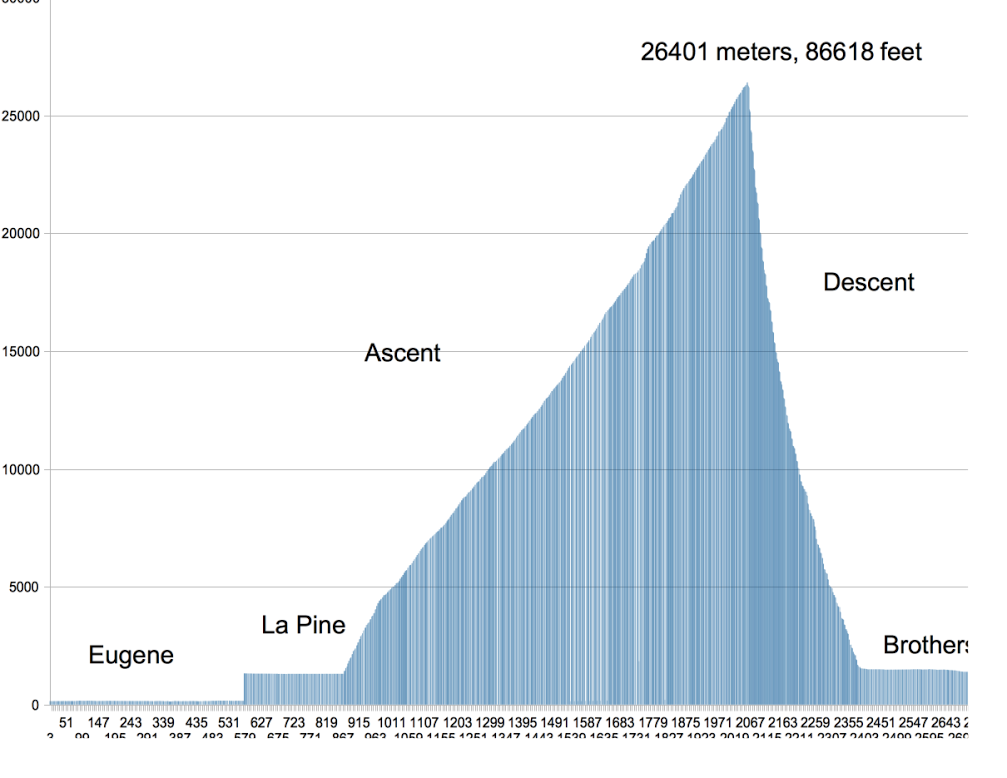
The below graph plots the payload’s altitude roughly over time. You can see that the descent is must faster than the ascent.
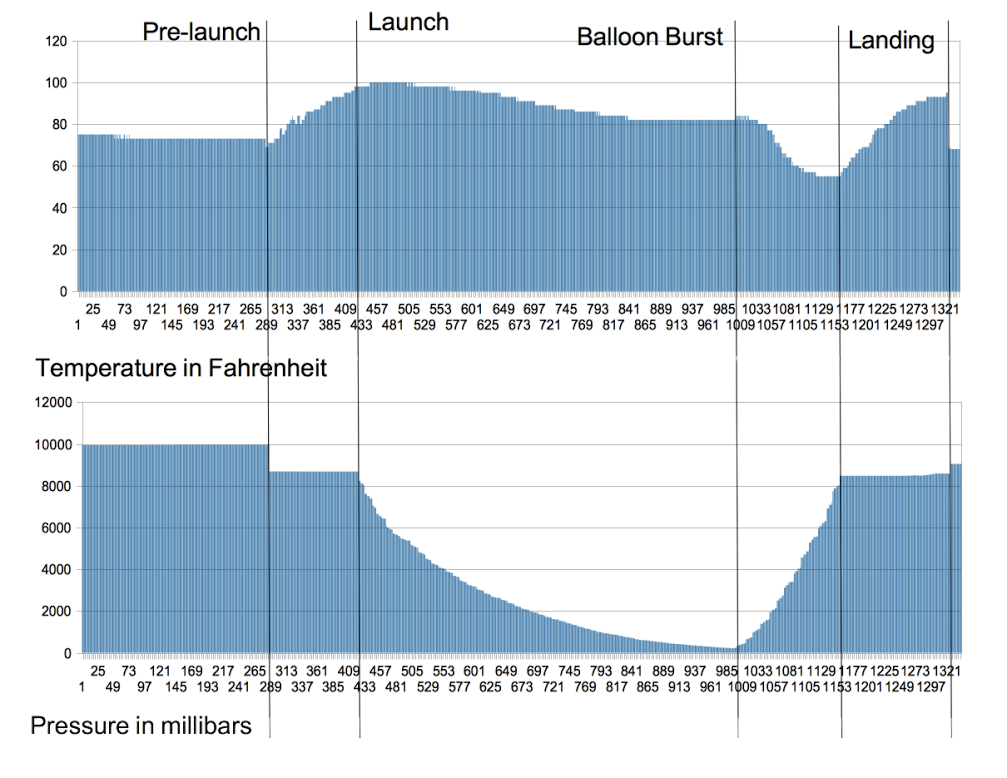
The below graphs plot the internal temperature of the payload over time, as well as the atmospheric pressure over time. The pressure at the apex of the flight was lower than any of us expected. It is also interesting to note that the temperature inside the payload was much colder during descent. This is likely because our capsule was not air tight and therefore cold air was flowing through it as it fell at a high velocity.
Next Steps
We have a lot of great ideas for improvements and additions. We are planning to launch a new and improved payload some time in September. This project is open to anyone who wants to help, regardless of prior experience. We just want to get more people involved in making things and doing awesome stuff! If you would like to join the fun, contact Rick (at) RichardOsgood.com and let me know!
More Information
To view more photos from this mission, check out the EMS Facebook album.
More information related to the code and inner workings of the primary payload can be found here.